How to Light a BBQ Like a Pro!
Updated: 23 February, 2024
How to Light a BBQ Like a Pro!
Updated: 23 February, 2024
You’ve marinated the meat, checked the weather forecast a million times and the beers are chilling in the fridge.
On the face of it, you’re all set to impress your friends and family with the ULTIMATE BBQ. Until, that is, it comes to lighting the charcoal.
If you’ve found yourself breaking out into a sweat one too many times when your guests arrive, and the BBQ is still not lighting, keep reading…
Step 1. Clean the Grill
Let’s start from the beginning. Don’t take for granted the importance of a clean grill. Soak and scrub it in warm, soapy water before you begin.
The meat will taste better and your guests will thank you for it.
Step 2. Be Safe and Stable
Safety is crucial so be sure to find a position in your garden that’s solid and stable.
Avoid bushes and overhanging trees and make sure that small children can’t get too close.
Step 3. Choose Professional Charcoal
A big debate among keen BBQ-ers is whether to use lump wood charcoal or briquettes.
At JJ’s, we love lump wood – it has little to no additives, which gives your meat a distinct, smokey flavour and aroma.
Lump wood is also quick-lighting and burns hotter than briquettes so it’s ideal for steaks and burgers.
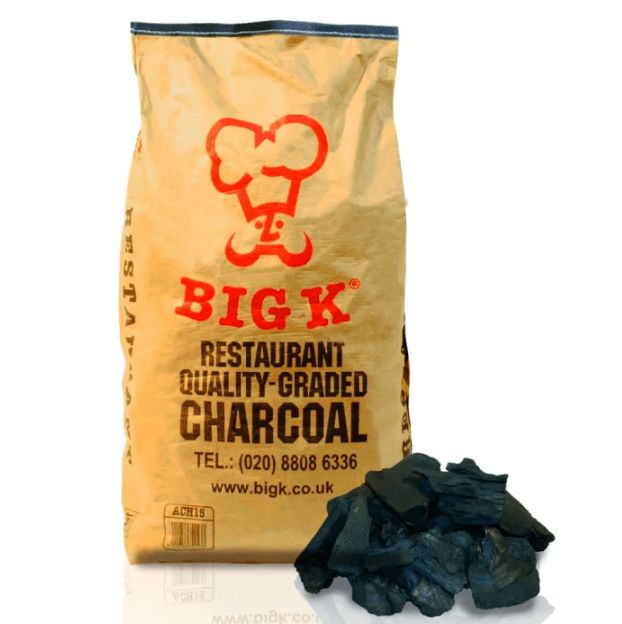
If you are a die-hard griller and want to keep the meat cooking all day – we recommend Restaurant Grade Charcoal used by professional restaurants.
Step 4. Pyramid Technique
BBQ-lovers might be familiar with the Pyramid method of lighting the coal.
Simply take your charcoal and stack the individual pieces into a mound or pyramid shape, leave multiple gaps between the pieces.
This helps to increase the airflow through the mound, making lighting your BBQ quick and efficient.
TOP TIP: Use a Chimney Starter with fire lighters at the bottom, a little kindling and lots of coal to get your fire going with minimal effort.
Step 5. Fire Starters
To start the fire, use scrunched up newspaper inserted into the gaps in the charcoal stack. If you want to cheat a little, add broken up fire-lighters.
Finally, light the paper or firelighters and let the flames catch. To help the fire to take hold, you can fan the coals.
Step 6. White Hot
Once you’ve lit the coal sit back, have a cold drink and be patient – it will take 15-20 minutes for the coals to be ready.
You are looking for white hot coals with a glow in the centre. If you can still see flames, you need to wait a little longer.
When the coal is ready, spread them out evenly and put the grills in place to warm up.
Step 7. Know Your Heat
Intense direct heat is perfect for searing steaks. Coal should be placed as close as possible to the grill.
For meats that need longer, like chicken legs or lamb shish kebabs, place the coals lower for a slower cook.
Step 8. End on a High
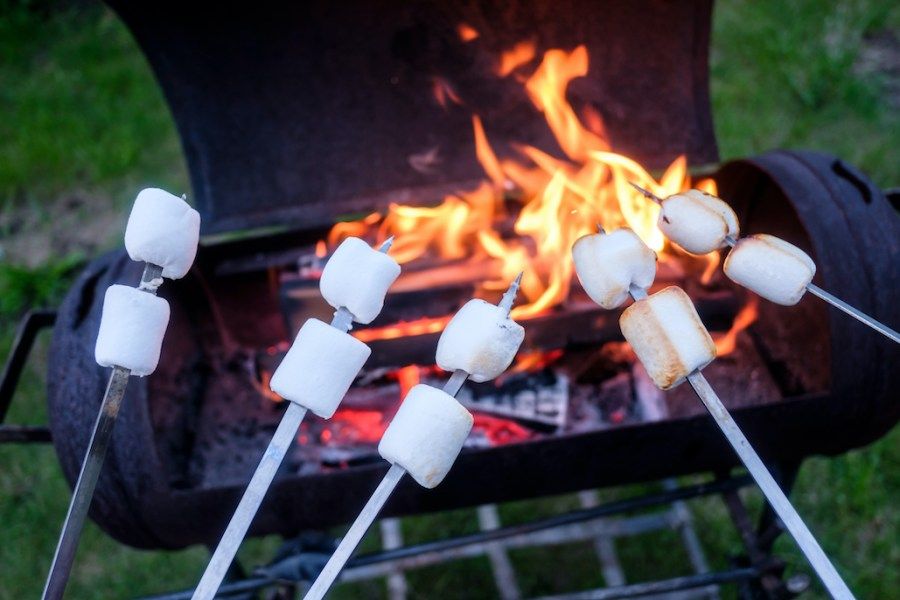
When your meat is done and you only have a slither of heat left on the coals, it’s the perfect time to make toasted marshmallows!
#BBQ #charcoal #grocerydeliveries #grill #BigK